
CONFESSION TIME: One of my biggest pet peeves is artwork hung incorrectly. And by this I mean too high, too low, staggered when there is no reason for staggering ( i.e., up a staircase wall ), etc. While there are no set rules when it comes to hanging artwork, there are guidelines. Knowledge is power, ya’ll, and you’ll thank me for it when my eyes aren’t twitching uncontrollably when I come over and see how your artwork is hung. I’m too polite to say anything, though.. I am a Southern girl, after all.
Guideline #1: Normal height for hanging artwork is to center it at eye level.

But whose eye level? You may be 4’11” but your husband is 6’4″– how do you decide? Law of averages, my friends. I’m 5’5″ ( ok, 5’4 1/2″ ), so my eye level is actually spot on. The safest height at which to hang artwork is 60″ from the center of the artwork to the floor.

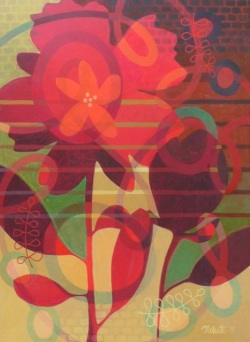
I couldn’t resist adding in this image from Traditional Home ( via House of Turquoise ). Recognize the work of our very own Pick of the Crop artist, Christina Baker?! Girl’s got skilz.
Guideline #2: Use picture hooks and D-rings for hanging whenever possible

Plain ol’ nails might be super cheap, but picture hooks are the best way to go to get your artwork to hang levelly and securely. The weight of a piece of artwork will drag down a nail, but the picture hooks are designed to set the nail at an angle so that the laws of physics hold the picture up, instead of putting all the weight on the nail. There are different size hooks available according to the weight of what you’re hanging, so if you’re in doubt about the weight, go with the heaviest weight hook so you’ll be sure your artwork won’t fall on someone’s head.. or toes.

D-rings are God-sends for hanging artwork and should be used instead of wire, if possible. Simply install two d-rings at the same horizontal level on the back of the picture frame. It’s true, you’ll need to put two holes in the wall instead of one, but your artwork will be more secure and won’t have that annoying habit of going crooked anytime it get’s bumped a little or someone closes a door a bit too hard.
Guideline #3: When hanging multiple pieces together, be aware of the space between them and how they relate to each other
If you’re hanging a pair or series of artwork above a piece of furniture, measure and treat the pieces as if you were hanging one solid piece– taking into account a bit of space between them and center the overall size horizontally above the furniture and center each piece vertically at 60″.

Guideline #4: Some rules were made to be broken
Not Guideline #2, the picture hook thing is always important, not just for aesthetics, but for safety. The other two, however, might be flexible depending on the situation.
- Broken rule #1– It is OK to hang artwork lower ( or higher, I guess, though this is less common ) than eye level if it helps the work relate to its surroundings

- Broken rule #2– Sometimes extending a grouping of work outside of the borders of a piece of furniture or other furnishing helps the artwork to make more sense within the room, as in the case of the room below. In this instance, more is more, yes?

- Broken rule #3– The rules are, there are no rules.. Sometimes the positioning of artwork doesn’t really need to relate to the surroundings at all.. randomness & asymmetry can be beautiful! If done well, of course.


If you ever find yourself unsure of how to hang your latest acquisition, I hope these guidelines are helpful. If you’re really stuck, drop me a line– I’m happy to help! Happy hanging!